
Views:0 Author: Dele-Heavy-Duty Industrial Hinge Manufacturers Publish Time:2026-07-01 Origin:Dele-Industrial cabinet lock manufacturer
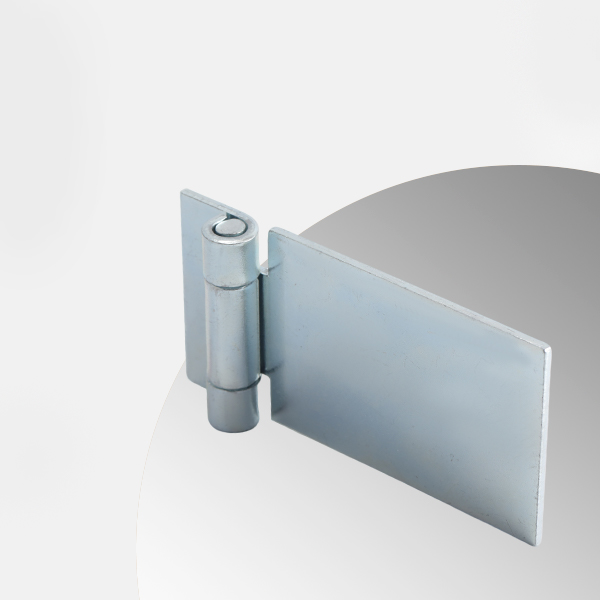
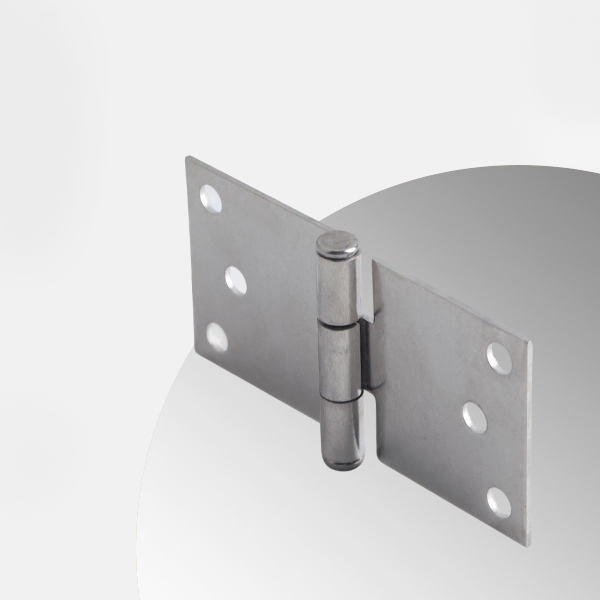
Heavy duty gate hinges are essential components for large-scale access systems in industrial, commercial, and residential environments. A properly executed installation guarantees long-term reliability, smooth operation, and workplace safety.
This guide walks through every critical phase—from pre-installation preparation and precise positioning to bolting, welding, and final commissioning—so your gate performs optimally under demanding conditions.
Before starting, gather an electric drill, hammer drill, spirit level, tape measure, marker, and socket wrench. For concrete or brick substrates, have expansion anchors and carbide-tipped bits on hand. Welded versions of this industrial hardware require an arc welder and a full-face shield.
Personal protective equipment is mandatory: impact-rated goggles, cut-resistant gloves, and steel-toe boots. During the process, metal shavings can fly and cause eye injuries. Always wear non-slip gloves when handling heavy door panels to prevent accidental drops.
Verify that all accessory parts are included—bolts, washers, and alignment jigs. Missing components delay work and compromise safety. Procuring from a trusted heavy hinge factory ensures complete kits and consistent dimensional accuracy.
Evaluate whether the supporting wall or frame can bear the dynamic load. Masonry must have adequate thickness and compressive strength for anchoring these heavy-duty pivots. Lightweight partitions or hollow-block walls are unsuitable for direct mounting of this type of gate hardware.
Check for buried electrical cables or plumbing lines before drilling—use a multi-scanner to locate hidden conduits. Keep bystanders clear of the door's swing arc throughout the process. Avoid outdoor installations in high winds; gusts can make the door uncontrollable. Indoors, ensure floors are dry and free from grease to prevent slips.
Secure the door with adjustable support stands or hardwood wedges before attaching any mounting assemblies. Door panels can weigh 100–300 kg (220–660 lbs), and a falling door can cause severe injury. Always have two persons: one to steady the door, the other to operate tools.
Lifting slings and chain hoists help raise the door to mounting height, reducing physical strain and improving precision. With the door suspended, aligning the brackets becomes far easier. For welded models, ensure the door is immobile before tacking.
Do not remove temporary supports until all bolts are torqued to spec or the welding is completely finished. Premature removal shifts the door out of alignment. Perform at least three full open-close cycles before removing supports to confirm the hinge assemblies are bearing the full weight properly.
For most applications, place the hinges at one-third and two-thirds of the total door height. The wider the spacing between upper and lower units, the better the load distribution. Measure from the bottom edge upward and mark the centerline with a fine-tip marker.
Use a spirit level to ensure both mounting points lie on the same vertical axis. An offset greater than 3 mm leads to uneven gaps when the door is closed. Mark corresponding positions on both the door edge and the frame simultaneously.
A third hinge can be positioned slightly above mid-height to boost wind-load resistance. For extremely tall or oversized doors, consider one unit per meter of height. Reputable heavy hinge factory manuals often specify the ideal spacing for their products.
Calibrate the hole positions using a spirit level to guarantee horizontal trueness. For verticality, use a plumb bob or laser level to prevent tilting. Each mounting assembly should be verified with at least two independent reference points.
Before drilling, apply a positioning template to mark all screw holes accurately. Templates significantly reduce layout errors. If a template is unavailable, measure the hole spacing with calipers and transfer the dimensions manually.
After layout, double-check the consistency of hole positions between the upper and lower units with a tape measure. Keep tolerance within ±1 mm before drilling. Accurate positioning of these commercial door hinges is the foundation for long-term, warp-free operation.
Leave a uniform gap between the door and the frame during installation. The standard clearance is 3–5 mm to ensure the door swings without rubbing. Use equal-thickness shims to hold the gap steady during alignment.
Excessive gaps compromise weather sealing; insufficient gaps cause binding. Adjusting the mounting position lets you fine-tune the clearance. When three units are fitted, measure the gaps at the top, middle, and bottom individually for consistency.
Once the gaps are confirmed, mark the final outline of the hinge leaves on the frame. All subsequent fastening refers to these marks. For extra-heavy doors, consider widening the gap to 6 mm to accommodate minor structural settling over time.
Choose a drill bit one size smaller than the bolt diameter for pilot holes. For a 6 mm bolt, use a 5.5 mm bit. Drill depth should be 5 mm deeper than the bolt length to allow full embedment.
Maintain the drill perpendicular to the mounting face to prevent angled holes that misalign the hardware. Deburr metal holes with a file or chamfer tool. For concrete, use a hammer drill in rotary-percussion mode and vacuum dust frequently.
After each hole, insert a bolt to verify smooth threading. If resistance occurs, stop and re-examine hole size and alignment. Inspect every mounting hole to avoid rework.
Position the hinge over the holes and hand-start all bolts for 2–3 turns. Once all bolts are correctly seated, tighten them using a cross-pattern sequence—diagonal from one corner to the opposite—with a socket or torque wrench.
Over-tightening distorts the hinge leaves or strips threads; under-tightening leads to loosening under vibration. Follow the torque values recommended by the manufacturer—for M8 bolts, typically 15–20 N·m. After final torquing, draw a marker line on each bolt head; if the line shifts later, the bolt has loosened.
Most heavy hinge factory datasheets list standard torque specifications. Always refer to these numbers for reliable fastening of heavy duty gate hinges.
For welded versions, start with tack welds—2 to 3 spots per hinge. After tacking, perform three open-close cycles to confirm smooth movement and even gaps. Only then proceed with continuous welding.
Use a back-step or skip-welding technique: keep each weld bead under 30 mm, and alternate between sides to prevent heat distortion that could shift the assembly. Allow 5 minutes of cooling between passes.
After welding, chip off slag and apply anti-corrosion paint to all weld zones. Weld seams are the most vulnerable areas exposed to moisture. For outdoor installations, add an epoxy topcoat after the primer.
Once all mounting assemblies are secured, slowly open and close the door 3–5 times. Any roughness or uneven resistance indicates alignment issues. Check the gaps along all four sides—the variation should not exceed 2 mm.
When the door is opened to 90°, it should stay in place without drifting open or closed. If the door moves on its own, the pivots are not perfectly vertical. Correct by adding 0.5–1 mm shims under the hinge leaf.
For units with integrated damping, test the cushioning action. The door should decelerate automatically in the final 15° of closing; if it slams, the damper needs readjustment. Non-damped models should close slowly and steadily, without abrupt acceleration.
After all adjustments, retorque every fastener in the same cross-pattern sequence to ensure even loading on the hardware. Confirm that the marker lines on bolt heads remain aligned.
For welded units, examine the weld beads—no porosity, slag inclusions, or cracks. Tap the welds lightly with a hammer; a clear ringing sound indicates good fusion, while a dull thud suggests incomplete penetration.
Apply a high-strength threadlocker to all bolts to resist vibration loosening. For outdoor installations, use a rust-resistant threadlocker. Record final torque values and gap measurements for each unit as a baseline for future maintenance.
During the first 72 hours of operation, check fastener tightness daily. Thereafter, perform quarterly inspections. If any bolt loosens, retorque to the standard value immediately.
Lubricate the pivot points every six months. For indoor use, apply molybdenum disulfide grease; for outdoor, use waterproof lithium grease. After greasing, cycle the door 10 times to distribute the lubricant evenly.
If the hardware develops unusual noise, visible sagging, or increased resistance, stop using the door and investigate. These same maintenance principles apply to cabinet hinges and heavy-duty industrial hinges. Contact the original supplier or a qualified heavy hinge factory for technical support. Properly installed and maintained, your heavy duty gate hinges can deliver safe, dependable service for well over a decade.
Installing heavy duty gate hinges safely requires strict adherence to four stages: preparation, positioning, fastening, and commissioning. Each phase directly affects the final security, durability, and user safety.
Before starting, assemble all tools and PPE, evaluate the structural strength, and brace the door to prevent tipping. During layout, measure hinge heights precisely, verify level and plumb, and maintain 3–5 mm uniform gaps.
For fastening, drill perpendicular pilot holes, tighten bolts in a cross-pattern to the recommended torque, and for welded types, tack-test-weld in sequence, finishing with anti-corrosion treatment. During testing, check operation smoothness, gap consistency, and limit function; retorque all fasteners and record baseline data.
For ongoing safety, routinely check bolt torque and relubricate pivots. Stay in contact with a reliable heavy hinge factory for installation guidance and technical backup. A correctly installed set of heavy duty gate hinges will operate safely for more than ten years, effectively preventing accidental door falls and protecting personnel.
Previous:When to Replace Heavy-Duty Hinges
Next:No More!


